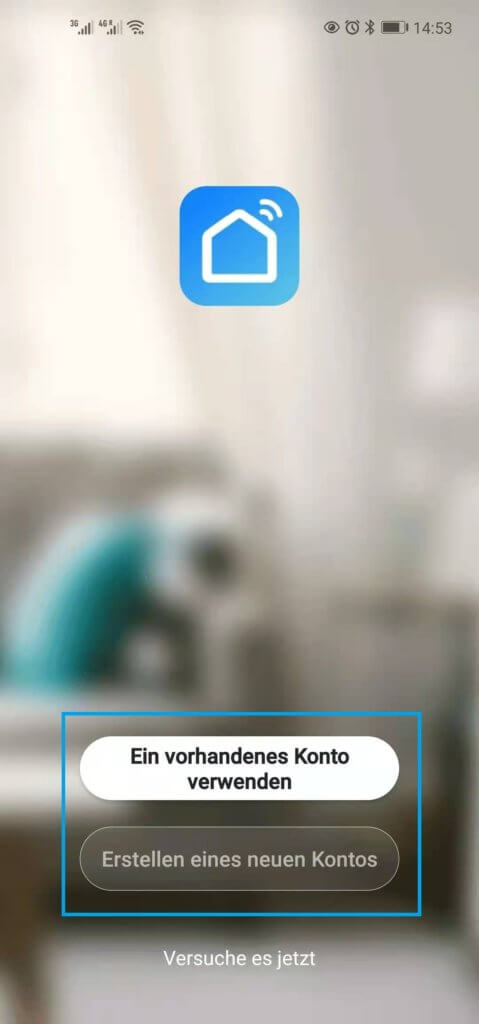
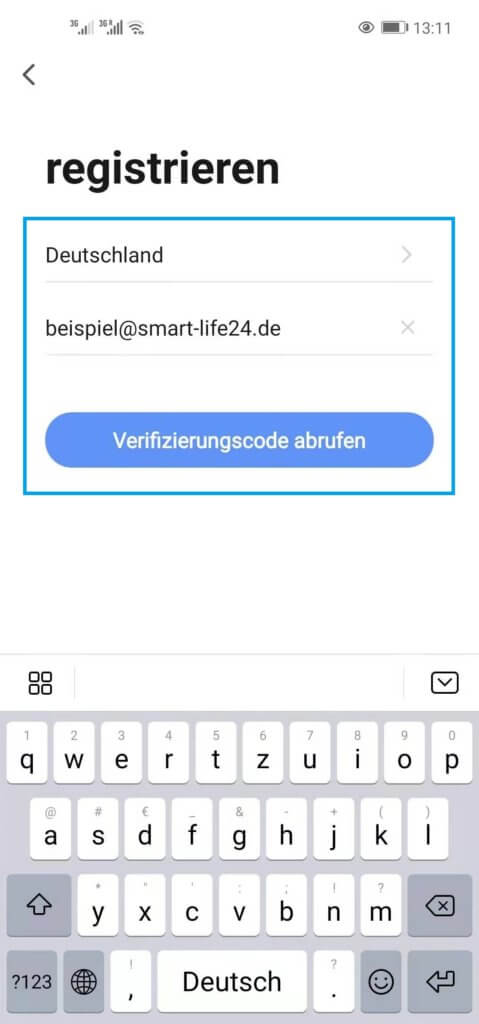
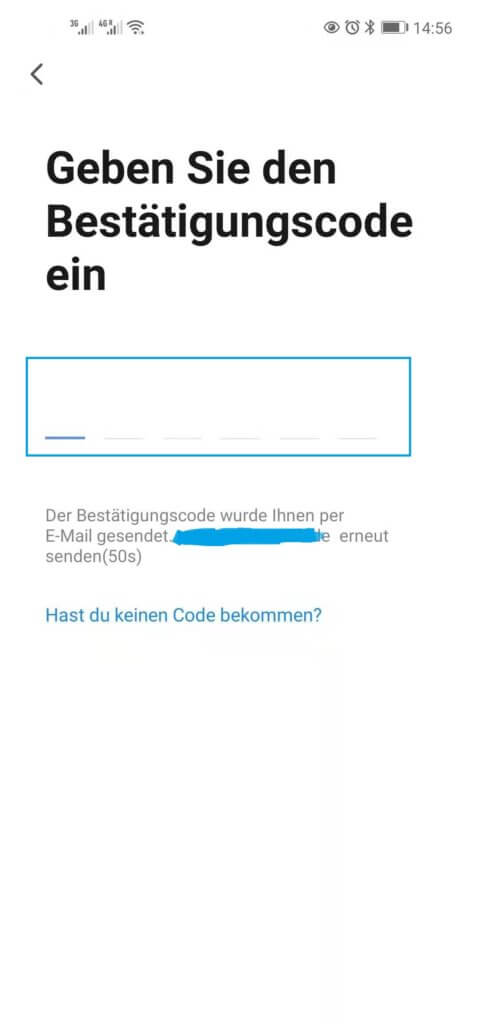
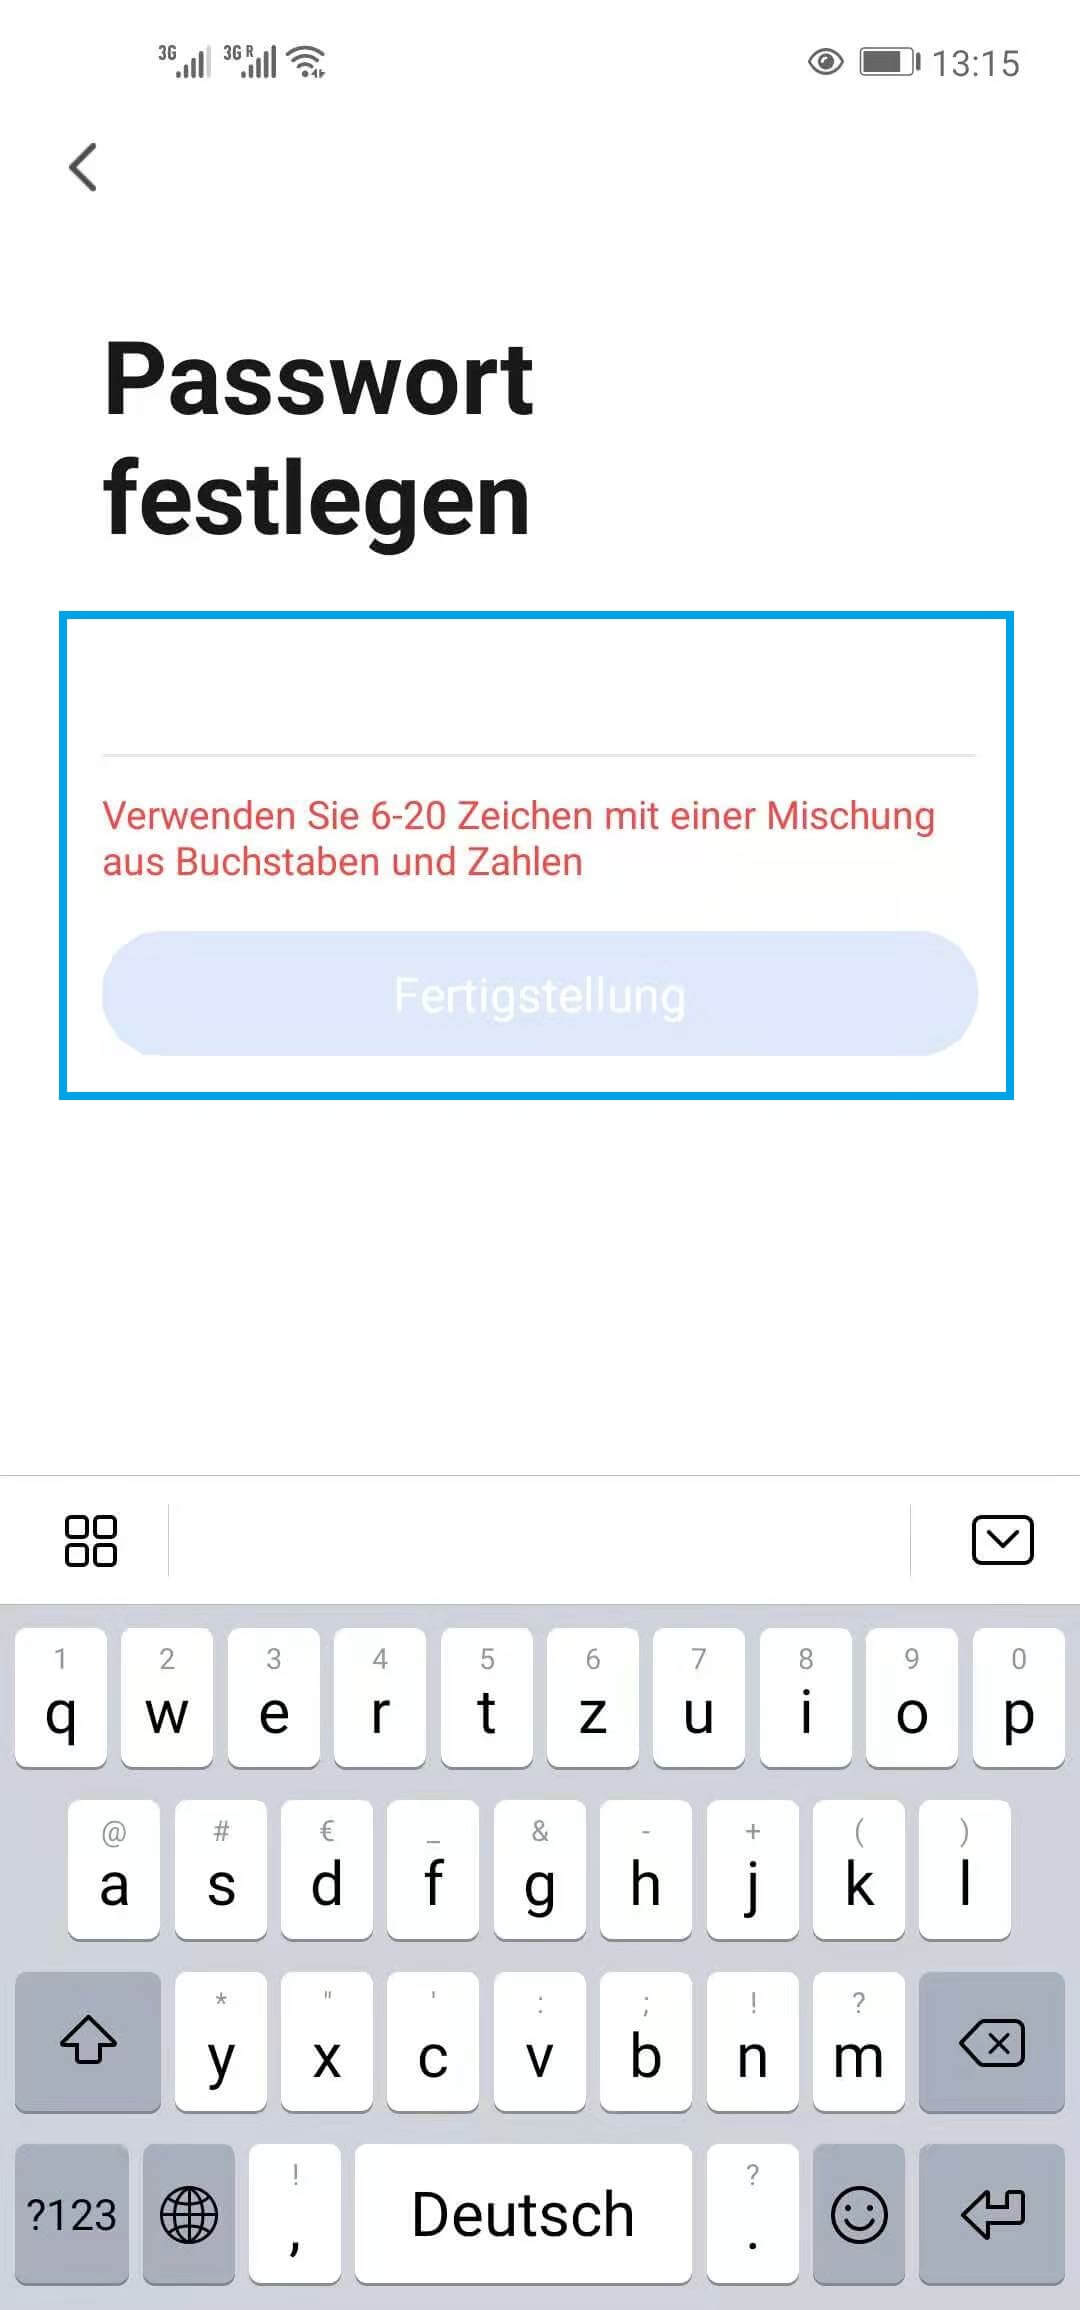
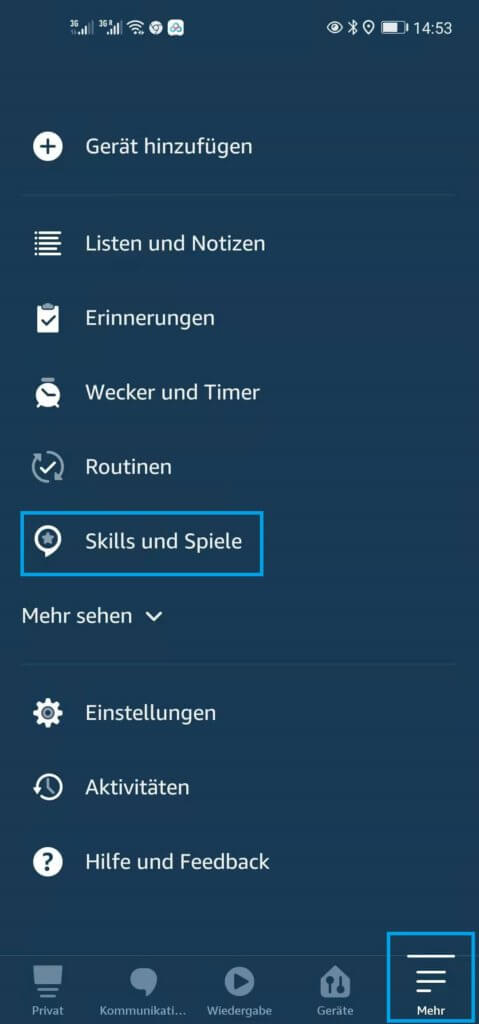
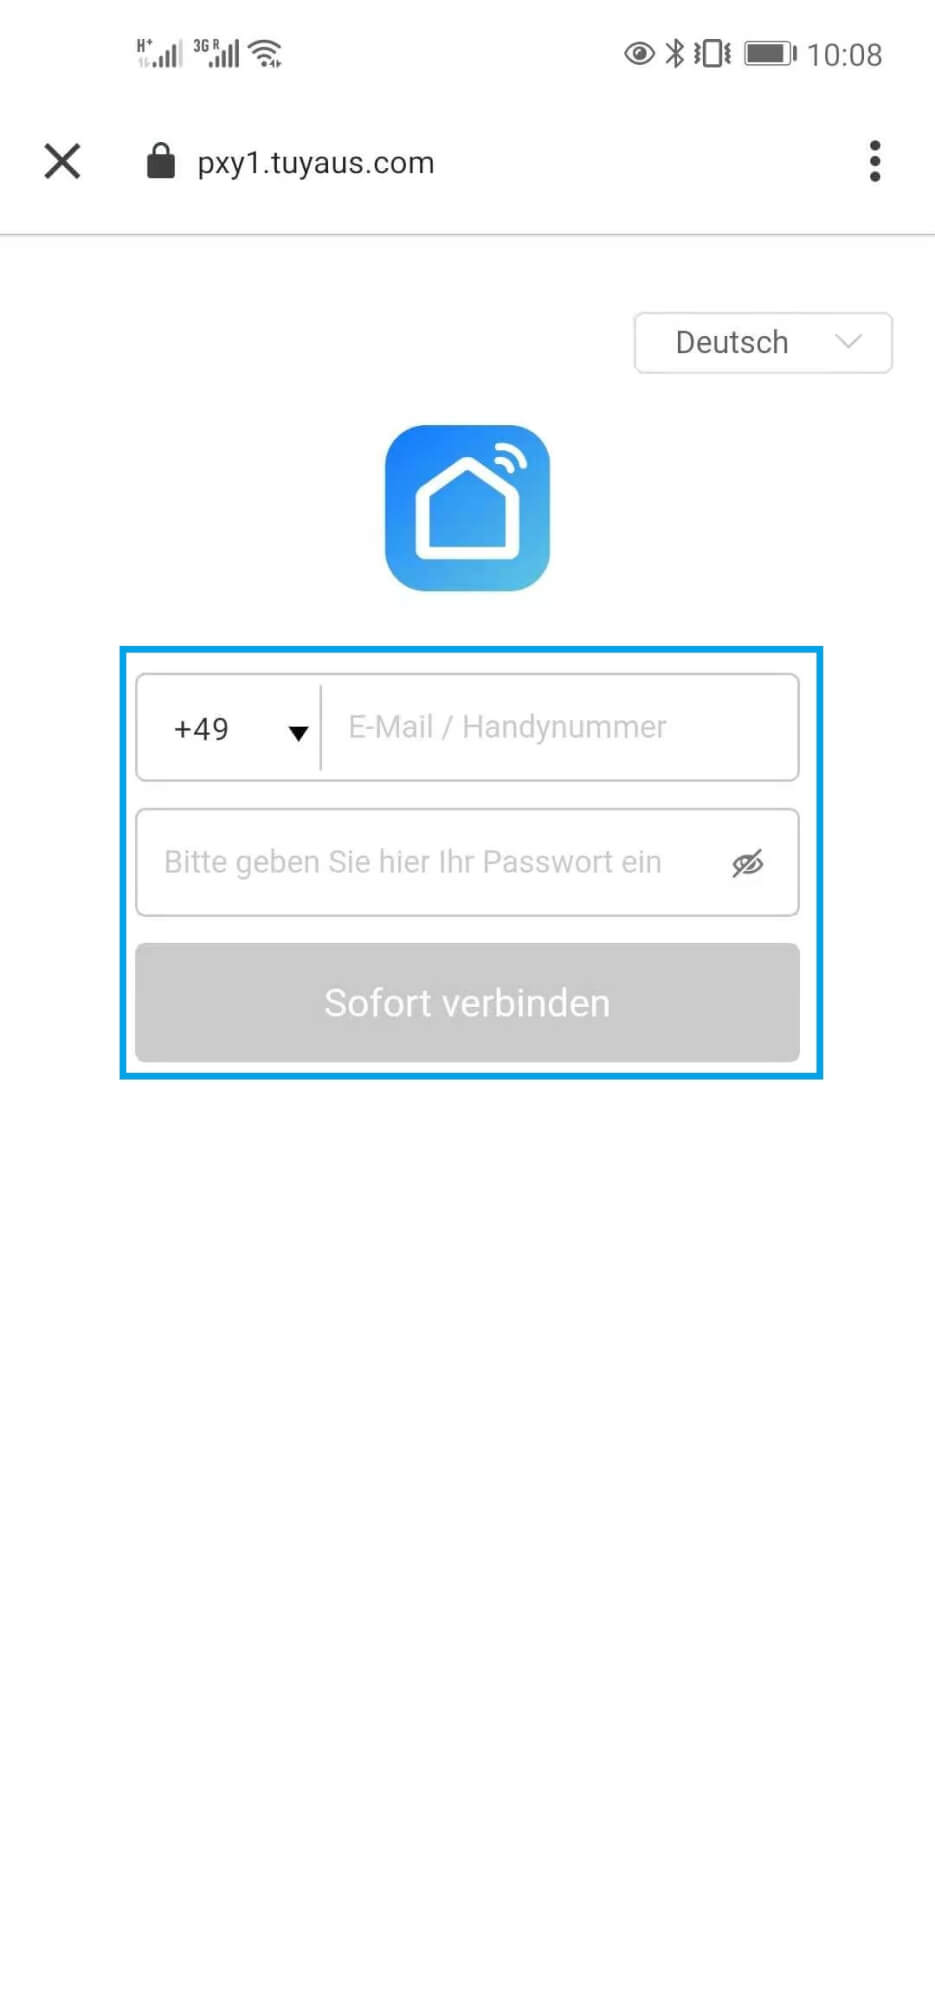
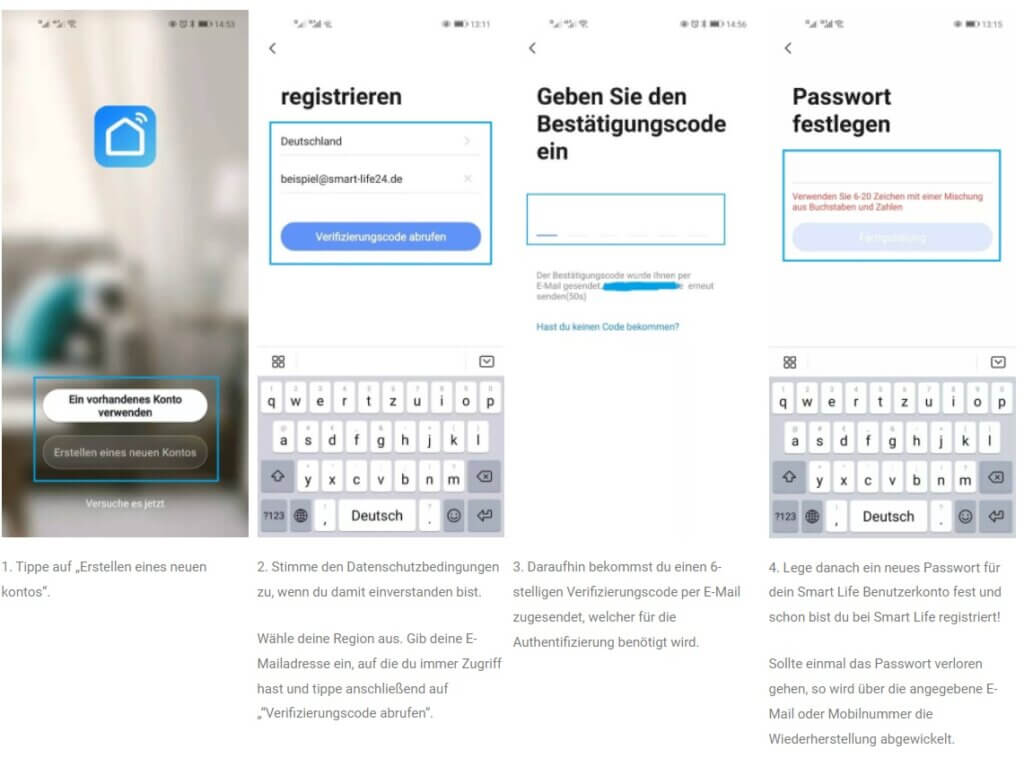
After you have downloaded the app and installed it on your smartphone, you must first register as follows:
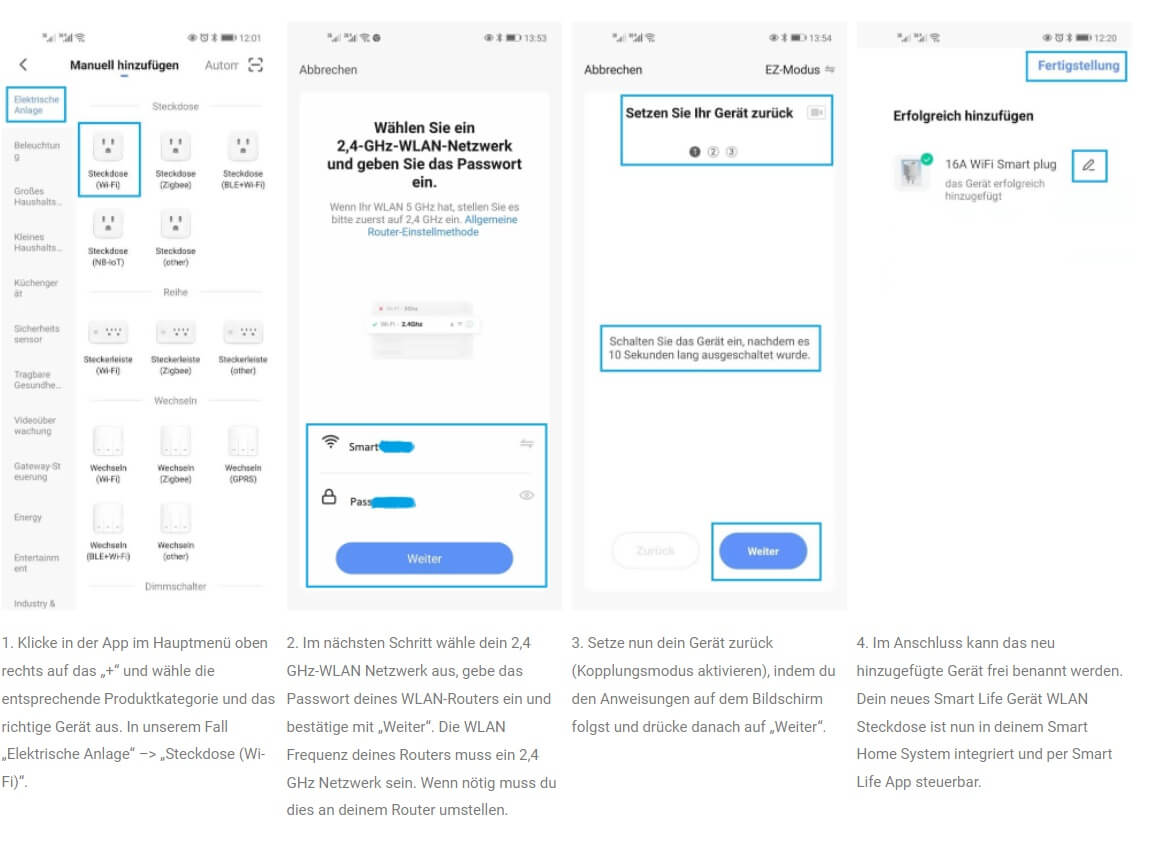
2. Add and control device
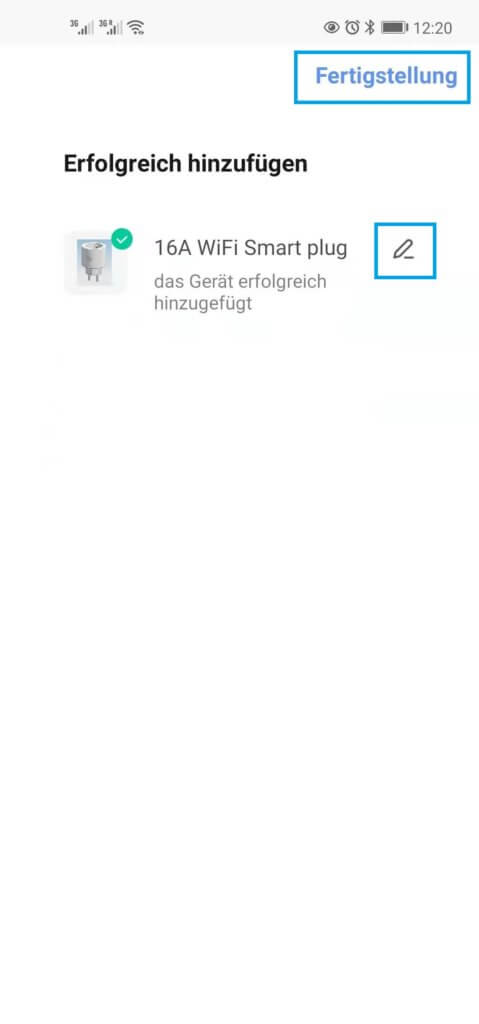
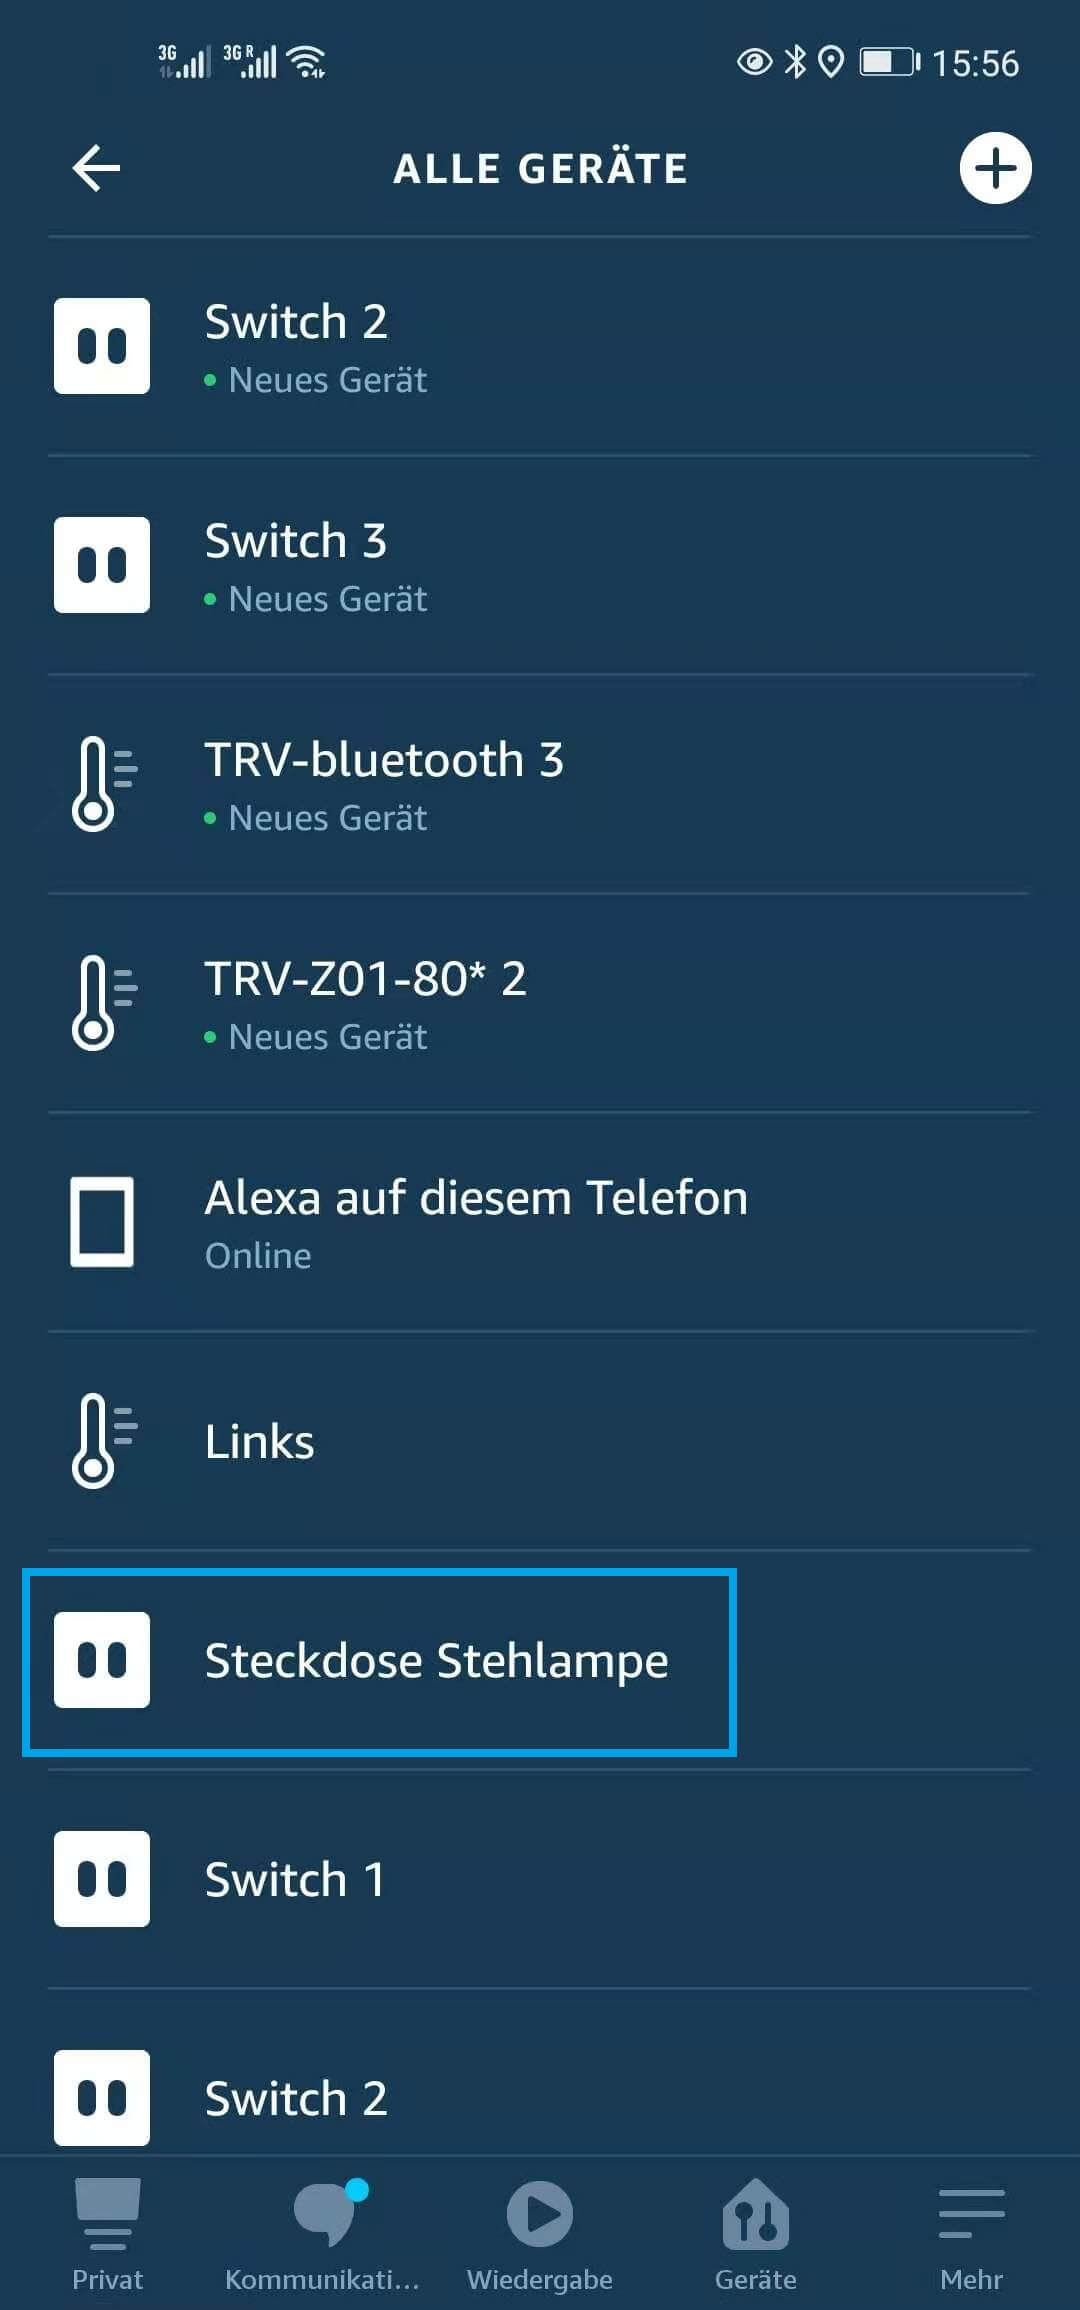
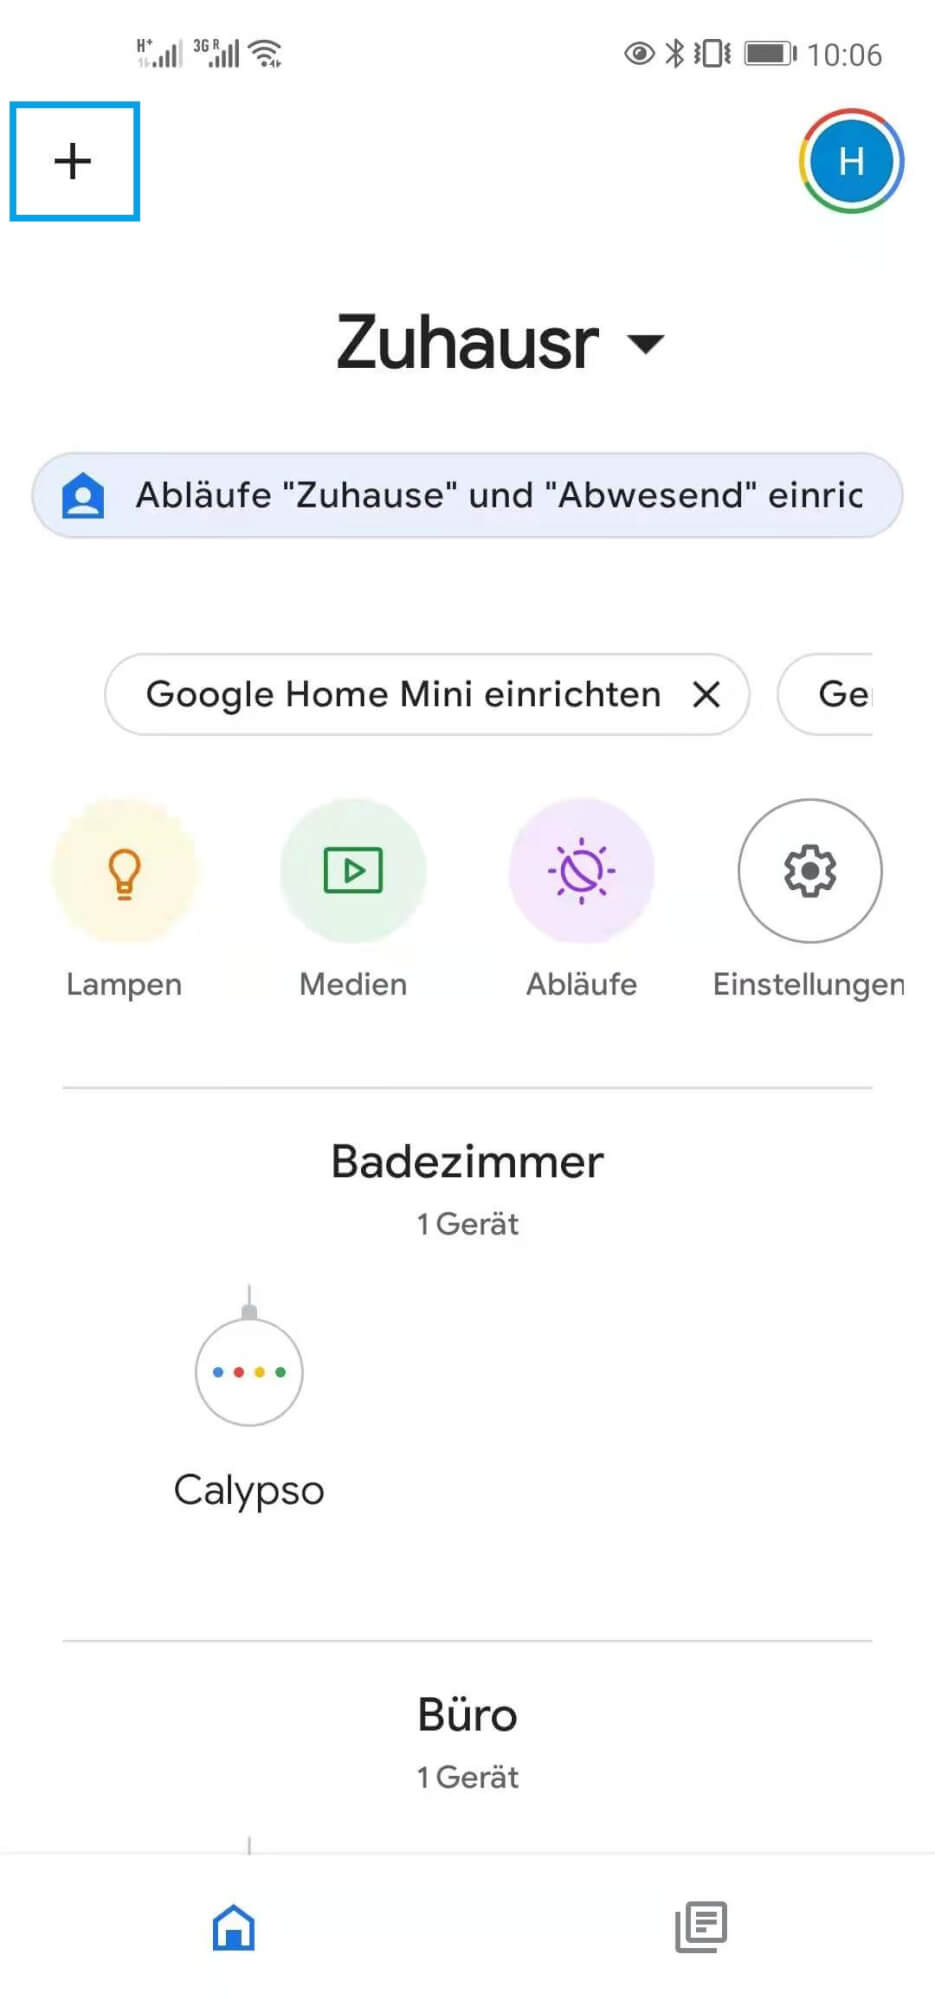
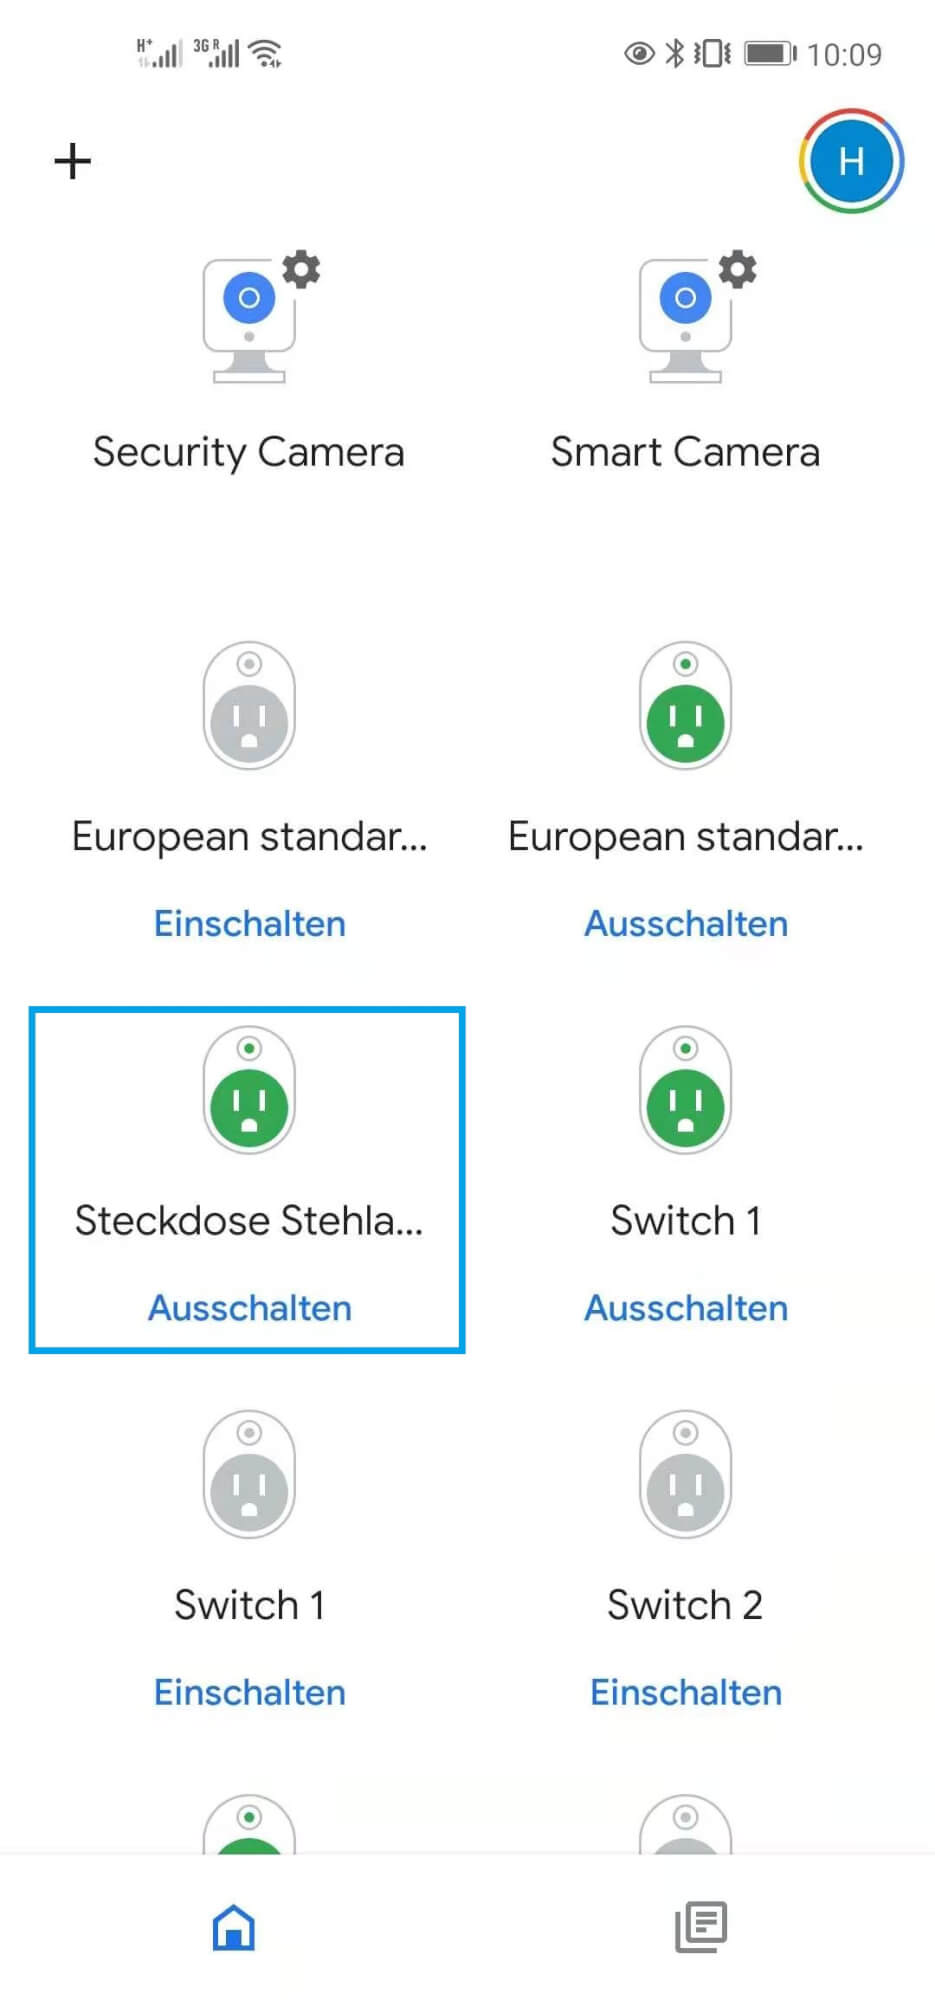
After successful registration you are now in the main menu and can add and control devices with your account.
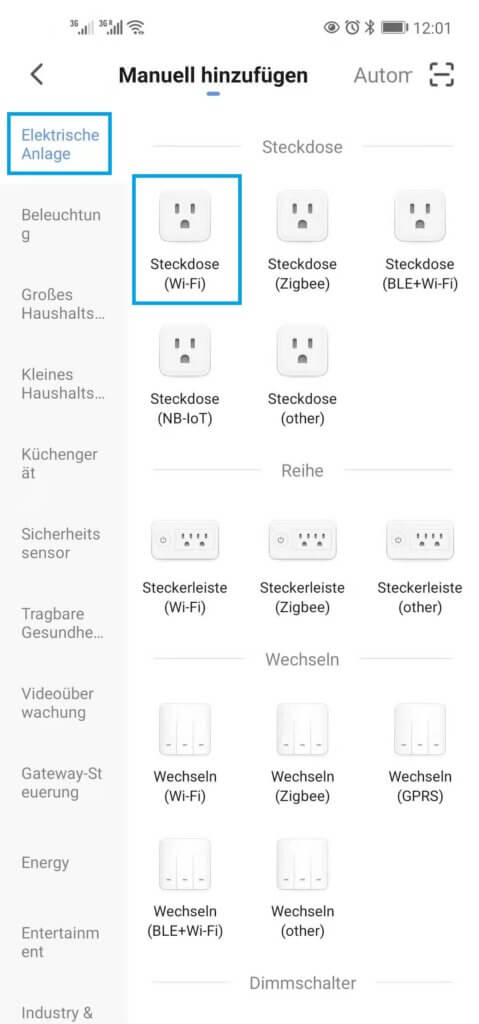
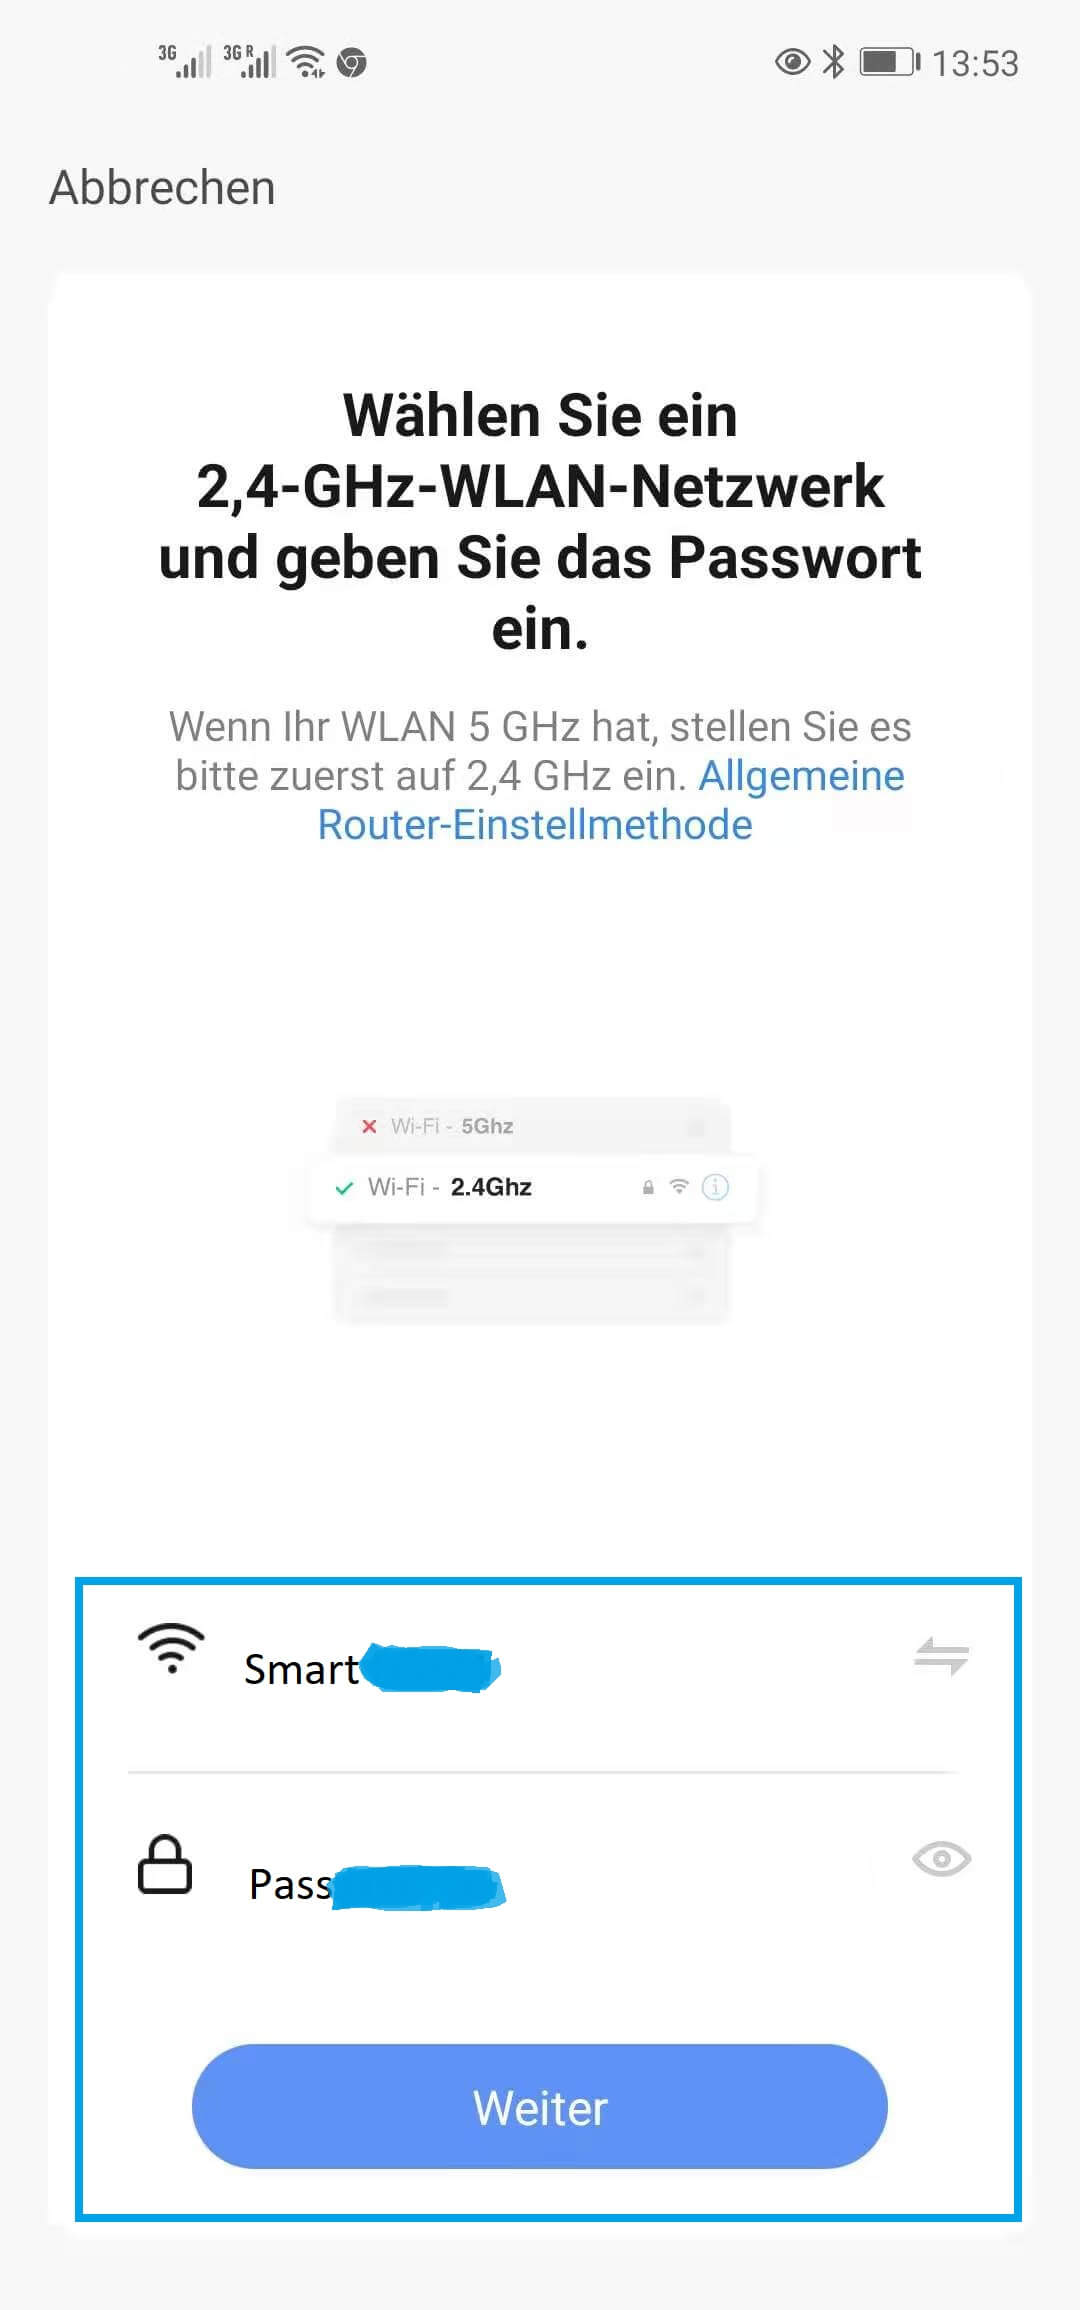
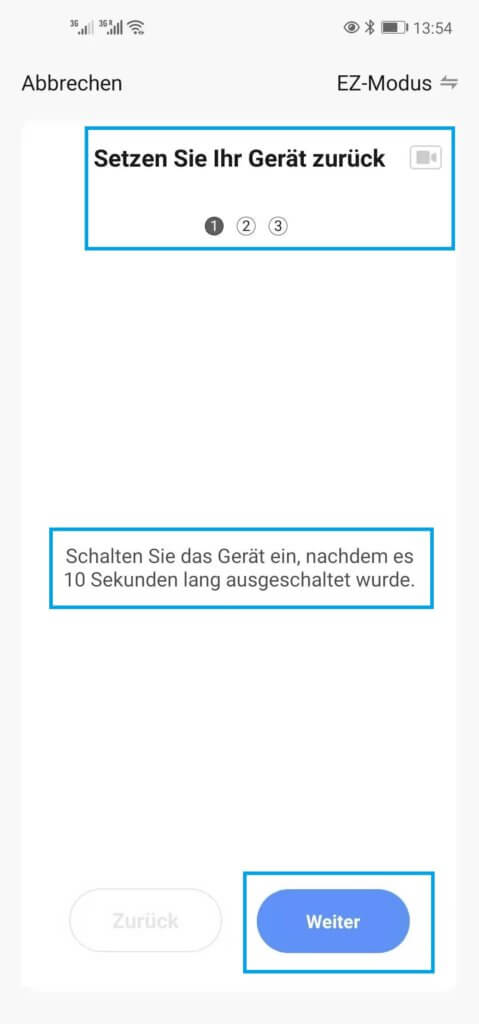
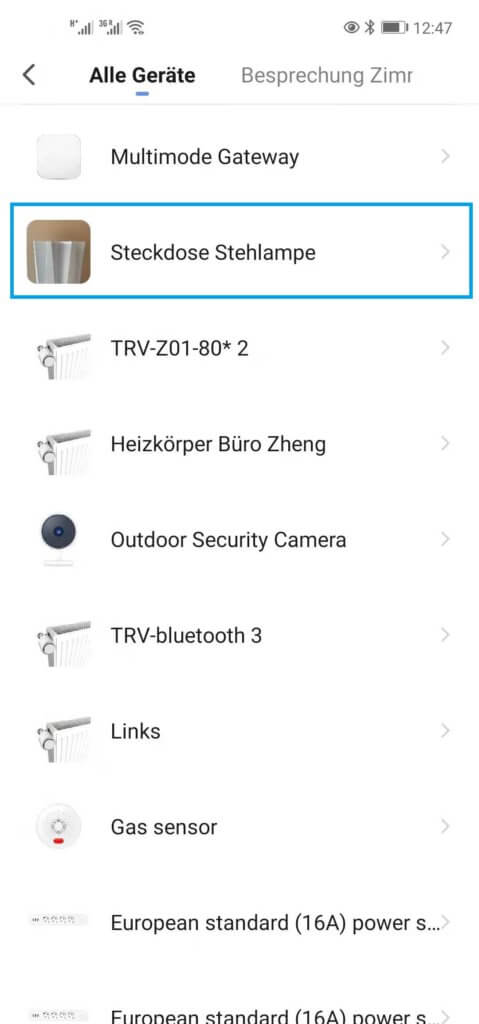
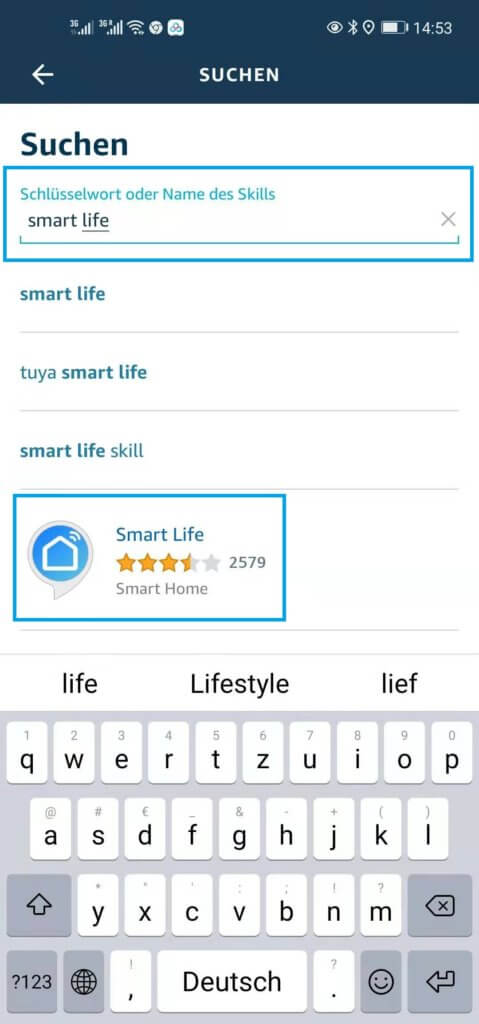
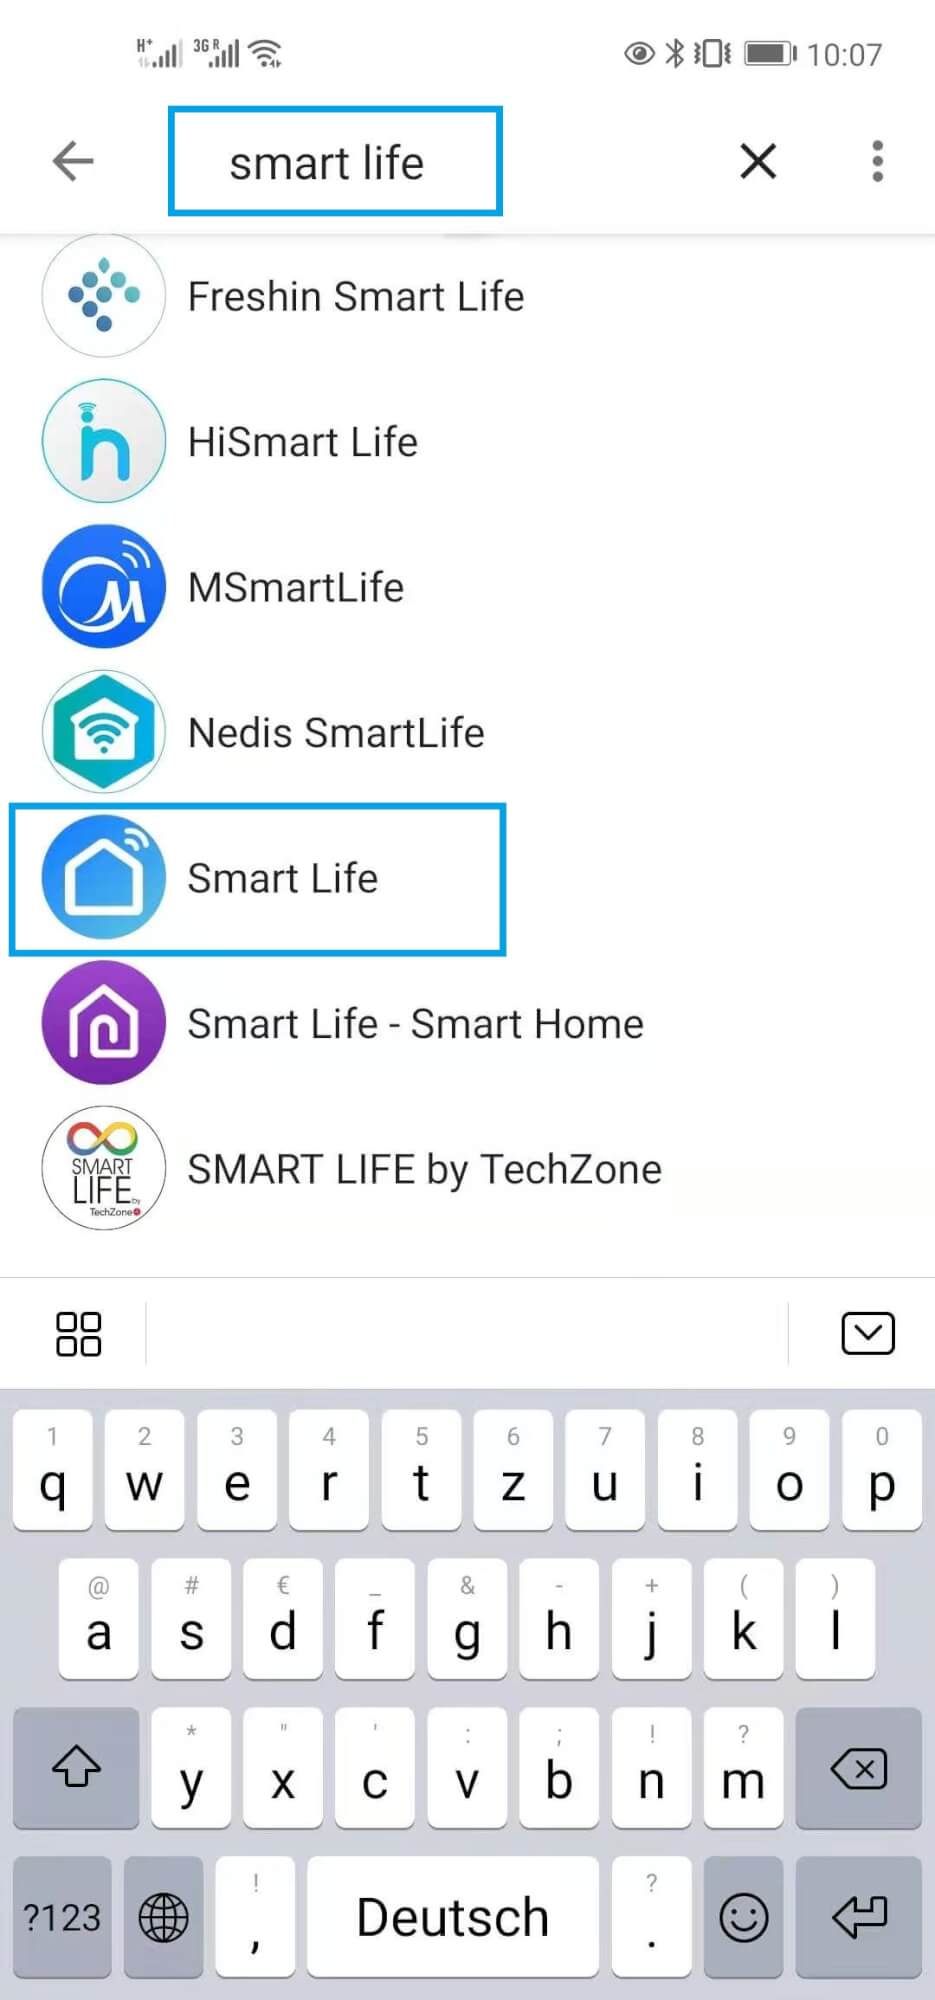
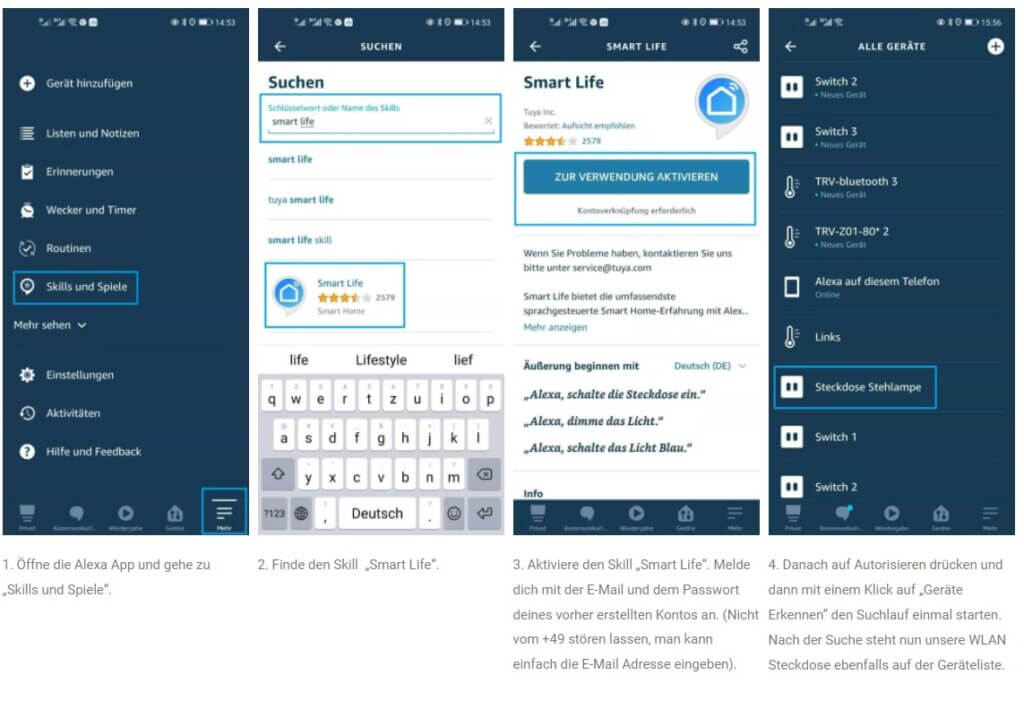
In our example we add a WLAN socket to the Smart Life System.
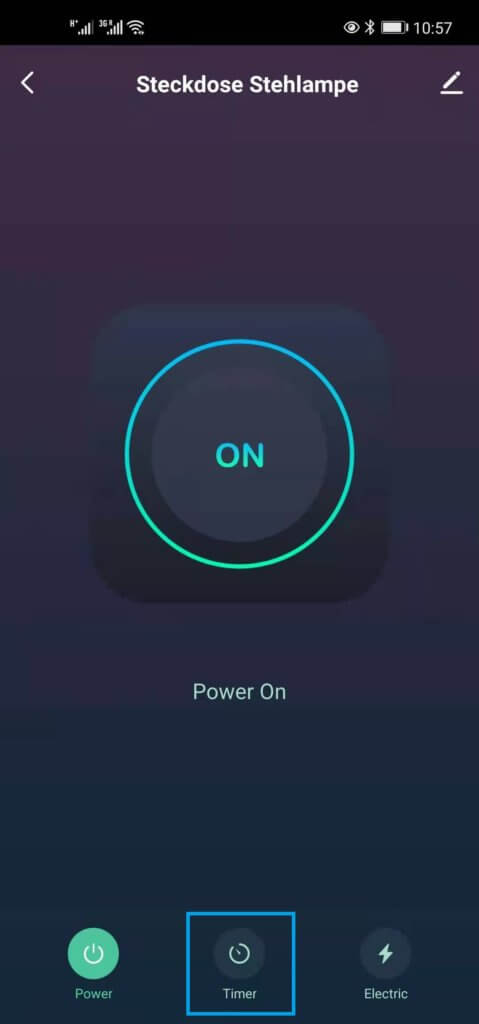
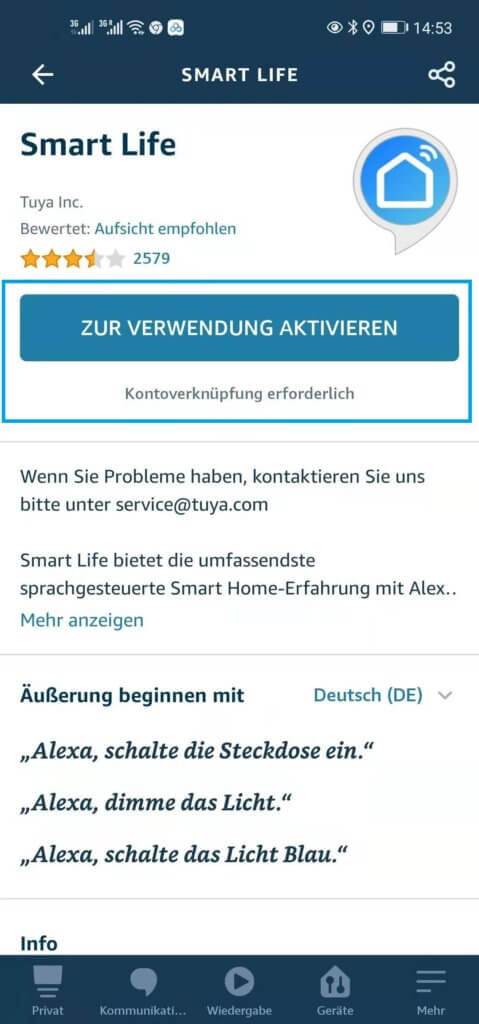
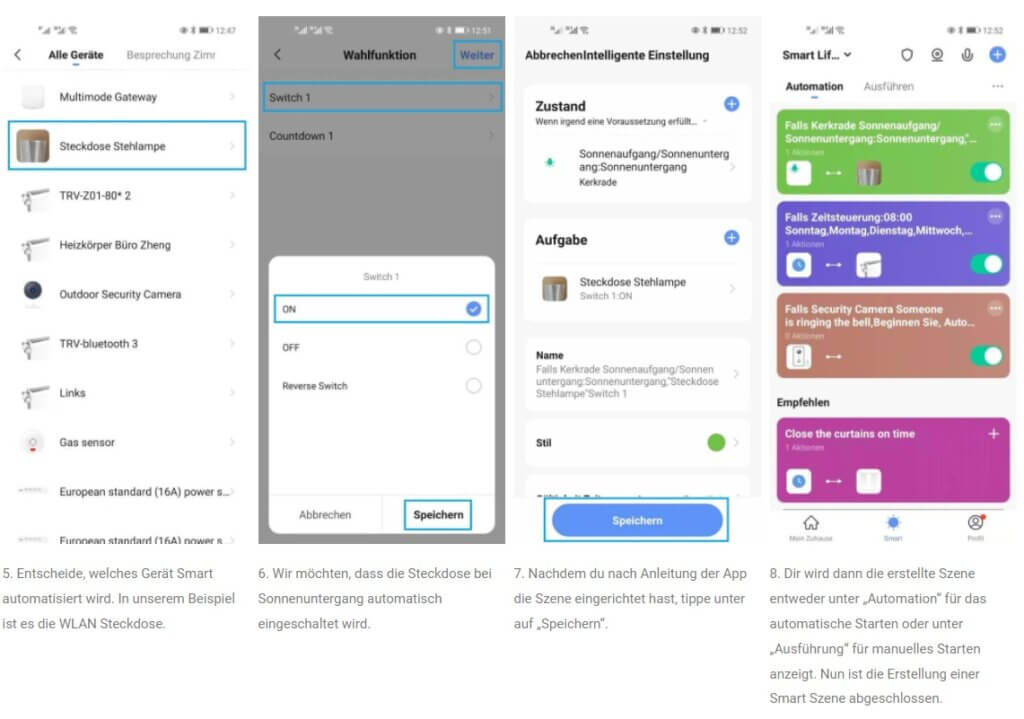
Select the device to be set in the "Smart Life" app, in our case it is again the WiFi socket.

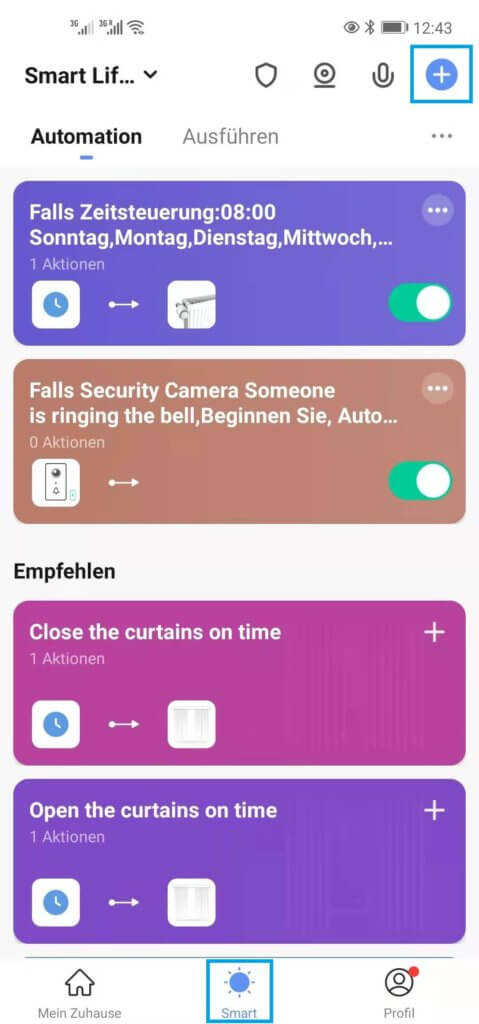
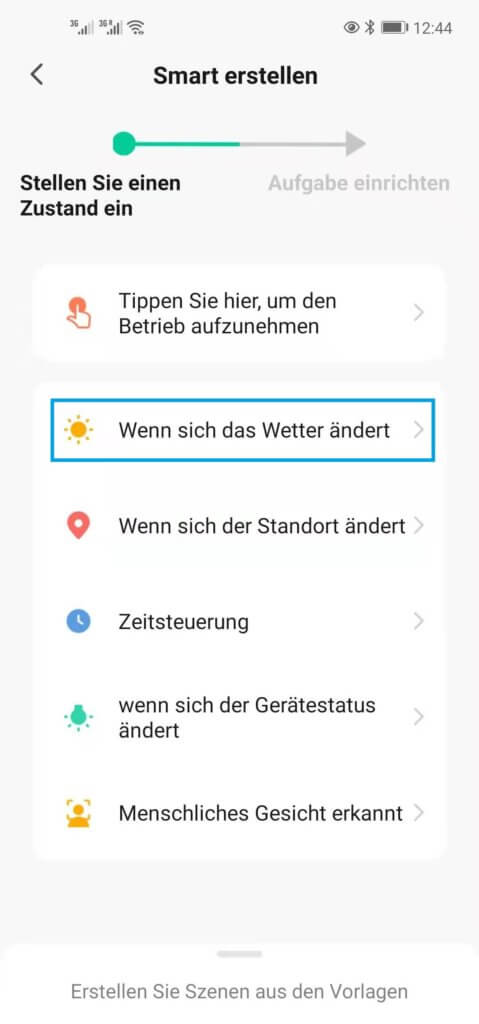
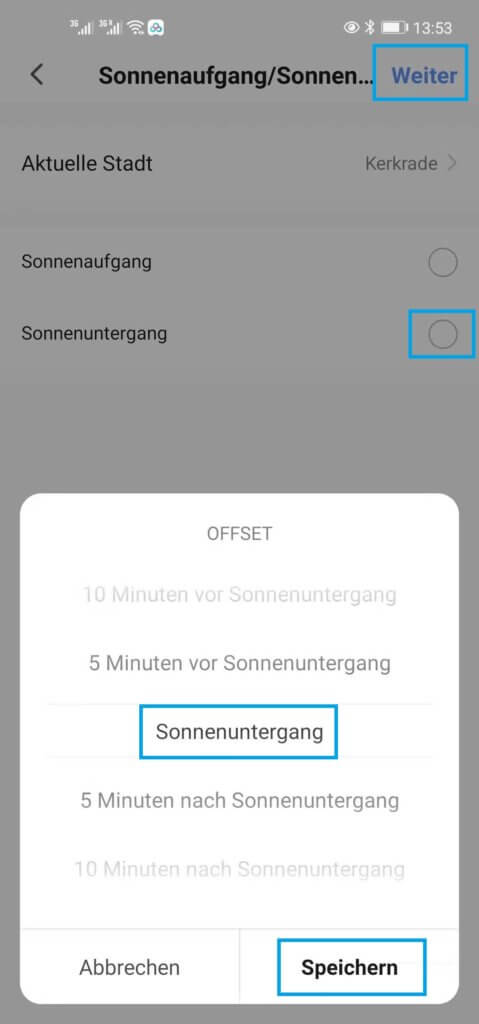
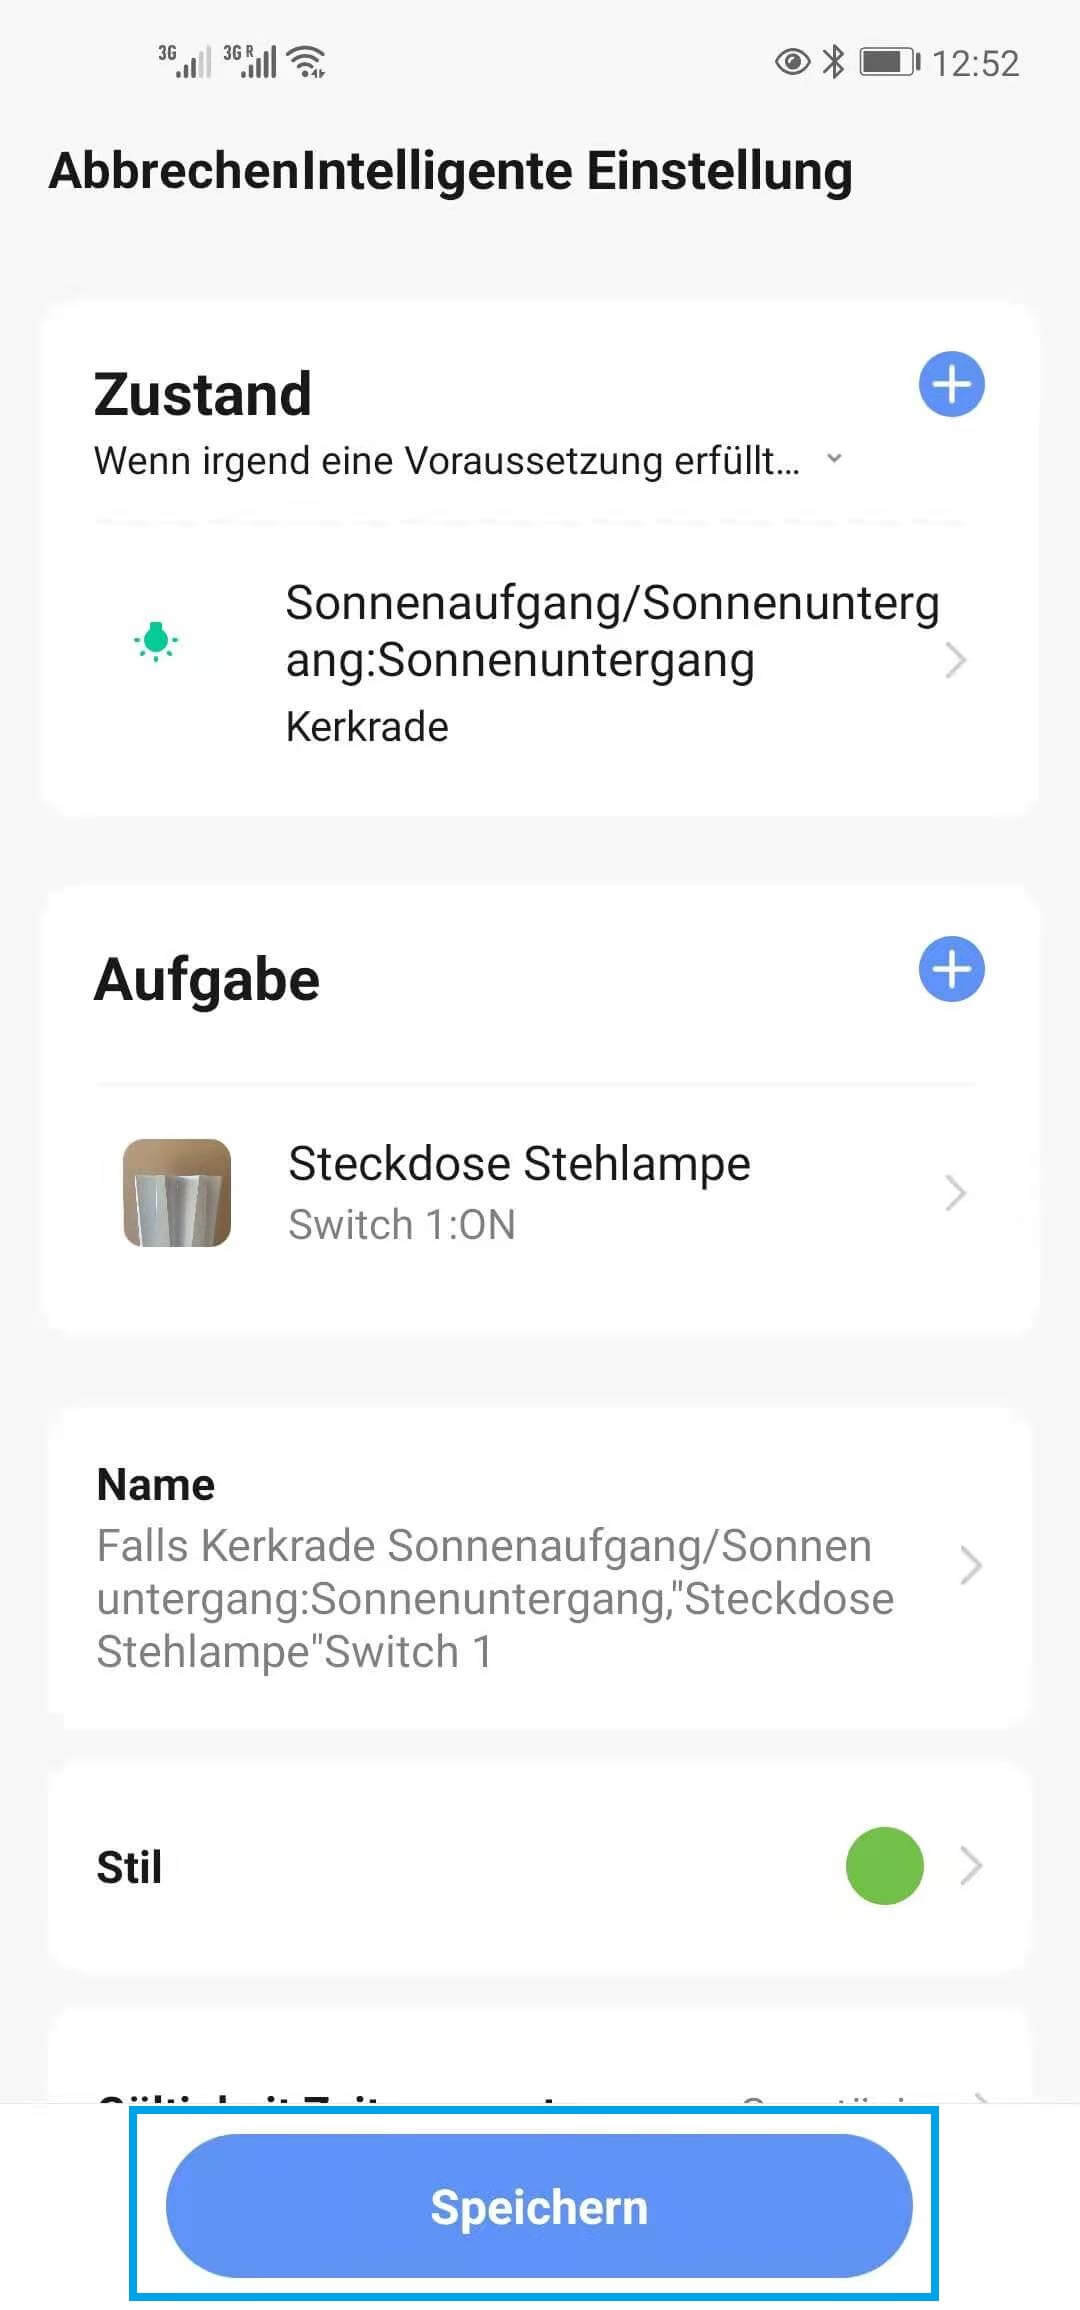
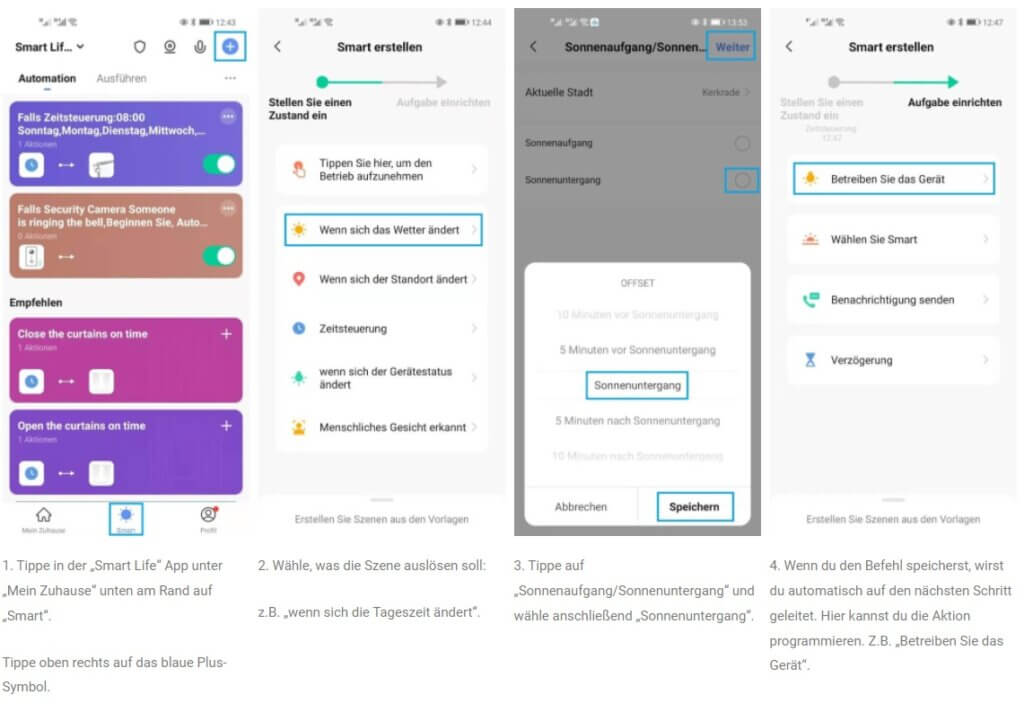
Creating a scene enables Smart Life devices to go into action individually or in combination with one another. For example, if one of the following conditions changes:
- The time of day
- The site
- Status change of an integrated device
- Manual activation
- The weather
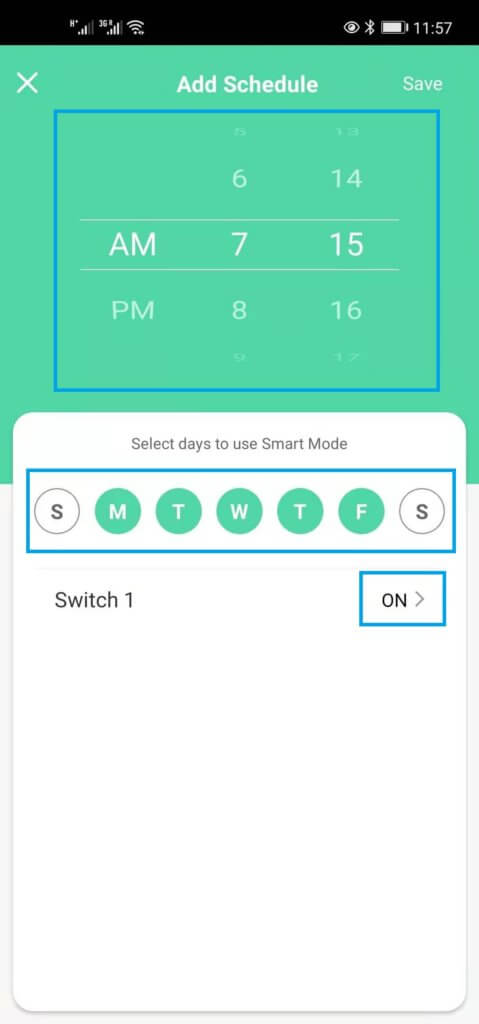
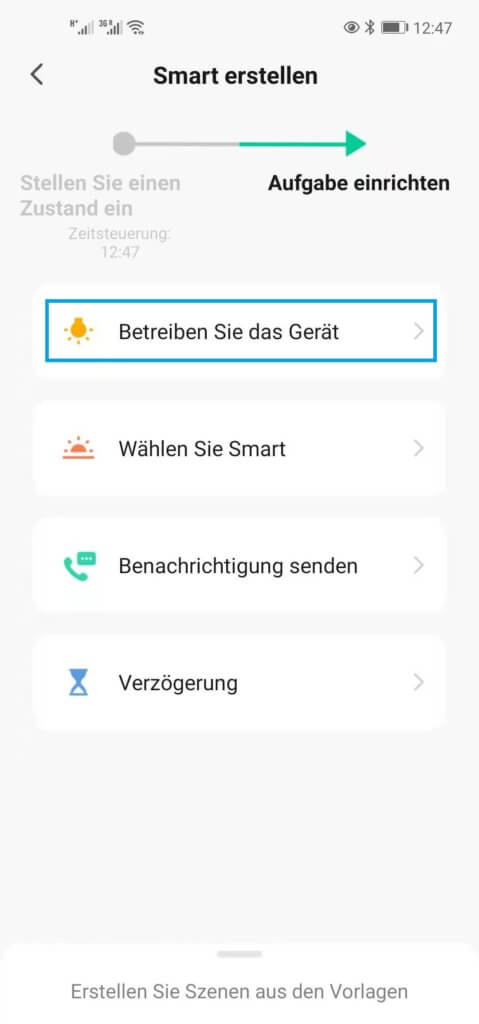
To create a scene, do the following:
After you have downloaded the app and installed it on your smartphone, you must first register as follows:
2. Add and control device
After successful registration you are now in the main menu and can add and control devices with your account.
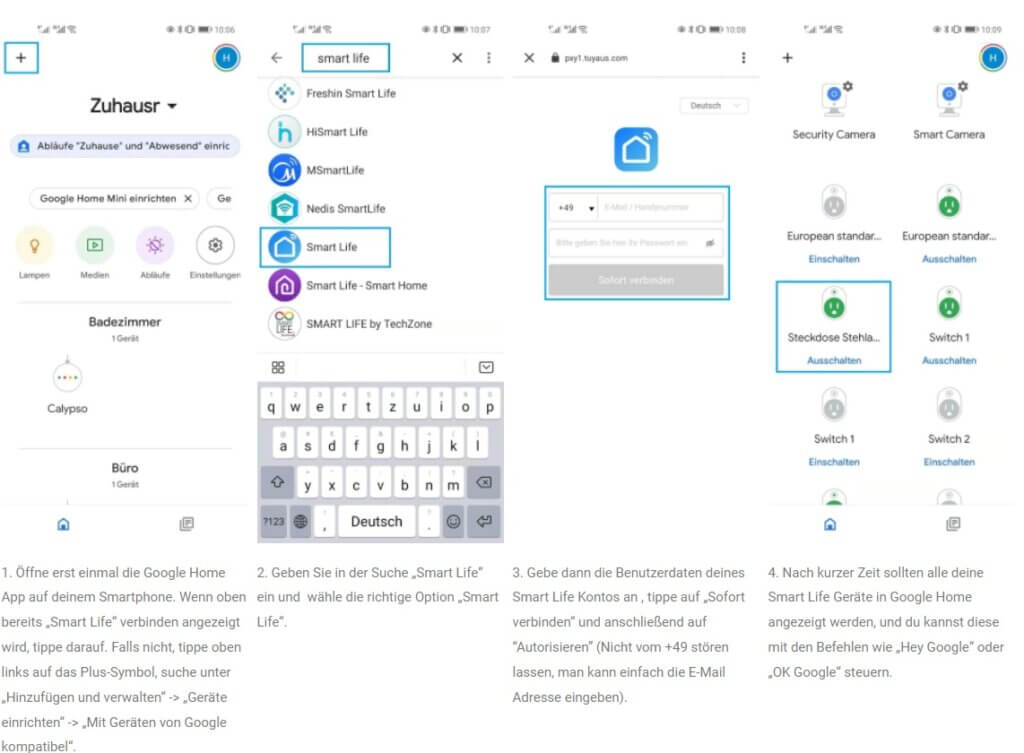
In our example we add a WLAN socket to the Smart Life System.
Select the device to be set in the "Smart Life" app, in our case it is again the WiFi socket.
Creating a scene enables Smart Life devices to go into action individually or in combination with one another. For example, if one of the following conditions changes:
- The time of day
- The site
- Status change of an integrated device
- Manual activation
- The weather
To create a scene, do the following: